66 posters, 2 videos, 1 audios, 2 topics, 162 authors, 49 institutions
ePostersLive by SciGen Technologies S.A. All rights reserved.
American College of Prosthodontists - 2020 ANNUAL SESSION
November 4-7 | Virtual Meeting
88
A workflow for fabricating an obturator using digital technologies
Poster Presenter
Authors
Affiliations
Part of Topic
Case Presentation
The primary goal of the obturator prosthesis is to preserve the remaining dentition and tissue and to provide comfort, function, and esthetics to the patient. The objective of prosthetic rehabilitation for total and partial maxillectomy patients includes separation of oral and nasal cavities to allow adequate deglutition and articulation, possible support of the orbital contents to prevent enophthalmos and diplopia, soft tissues support to restore midfacial contour and an acceptable aesthetic result.
Case description:
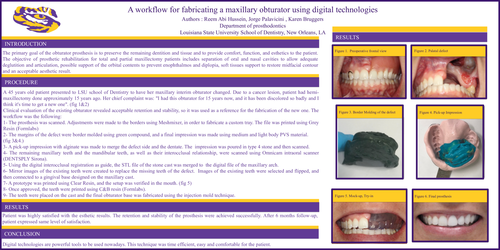
A 45 years old patient presented to LSU school of Dentistry to have her maxillary interim obturator changed. Due to a cancer lesion, patient had hemi-maxillectomy done approximately 15 years ago. Her chief complaint was: "I had this obturator for 15 years now, and it has been discolored so badly and I think it's time to get a new one". (fig 1&2)
Clinical evaluation of the existing obturator revealed acceptable retention and stability, so it was used as a reference for the fabrication of the new one. The workflow was the following:
1- The prosthesis was scanned. Adjustments were made to the borders using Meshmixer, in order to fabricate a custom tray. The file was printed using Grey Resin (Formlabs)
2- The margins of the defect were border molded using green compound, and a final impression was made using medium and light body PVS material.
(fig 3&4.)
3- A pick-up impression with alginate was made to merge the defect side and the dentate. The impression was poured in type 4 stone and then scanned.
4- The remaining maxillary teeth and the mandibular teeth, as well as their interocclusal relationship, were scanned using Omnicam intraoral scanner (DENTSPLY Sirona).
5- Using the digital interocclusal registration as guide, the STL file of the stone cast was merged to the digital file of the maxillary arch.
6- Mirror images of the existing teeth were created to replace the missing teeth of the defect. Images of the existing teeth were selected and flipped, and then connected to a gingival base designed on the maxillary cast.
7- A prototype was printed using Clear Resin, and the setup was verified in the mouth. (fig 5)
8- Once approved, the teeth were printed using C&B resin (Formlabs).
9- The teeth were placed on the cast and the final obturator base was fabricated using the injection mold technique.
Results:
Patient was highly satisfied with the esthetic results. The retention and stability of the prosthesis were achieved successfully. After 6 months follow-up, patient expressed same level of satisfaction.
Conclusion:
Digital technologies are powerful tools to be used nowadays. This technique was time efficient, easy and comfortable for the patient.